
You must know the challenges of creating and running marketing campaigns as a digital marketer. A successful marketing campaign requires strategic planning, target audience & behavior analysis, determining the right channel, message design, and competitive positioning.
And the most exciting part of developing a campaign is building an ad landing page. Every marketing campaign needs to be directed to a specific landing page to achieve better results. And, if you don’t know how to build a marketing landing page with Drupal 9, we will help you! However, before that, let’s learn a few things you must have on your landing page.
Also Read: How To Audit Your Drupal Website?
A Few Must-Haves in your Landing Page
The primary goal of a landing page is conversions. You must build a landing page that attracts users to your page and encourage them to convert sooner or later. Here are some of the key elements of a great landing page:
- Clear and concise copy
- Interactive elements like images or videos
- A simple and short lead form
- An attractive CTA
- An offer that your users can’t refuse
Now that you know what elements you must add to your landing page, it’s time to start creating or designing a marketing campaign page with Drupal 9.
Also Read: Environment Requirements For Drupal 9
STEPS TO DESIGN THE CAMPAIGN
So here’s how you can create a new Ad Campaign Page on the Drupal website
Step 1: Create a new Ad Page
- Go to the Admin section and then click on Content.
- Once you click on the Content, a dropdown menu will open, and then click on Add Content.
- Once you hit Add Content, you will get the Ad Page option in the menu.
- Select the Ad Page option


Also Read: Challenges In Migrating From Drupal 7 To Drupal 9
Step 2: Add Content to the paragraph types
Once you select the Ad Page option, a new page will open where you’ll need to enter Content to the paragraph types. Title, Main Title, and Description are the paragraph types.

Title – It gives Content about your page to the users and helps with SEO optimization. As this text will show up in the SERP as the title, use tags that are relevant to your keywords and branding business.
Main Title – This is the H1 of your page. Use this space to enter the main keywords of your website. Make sure your main title is catchy for readers.
Step 3: Add Description
It should give the gist about your process/ landing page to your customers/ potential customers. Once you are done with the description, hit the Insert image icon, browse for the image and upload it.

Add alternative text to ensure your image is accessible to all. And then hit save to see the image right there in your editor. Finally, you can align the image as per your choice – left, right, or center.


Also Read: Drupal 9 Vs. Drupal 8: Should You Upgrade Your Website To Drupal 9?
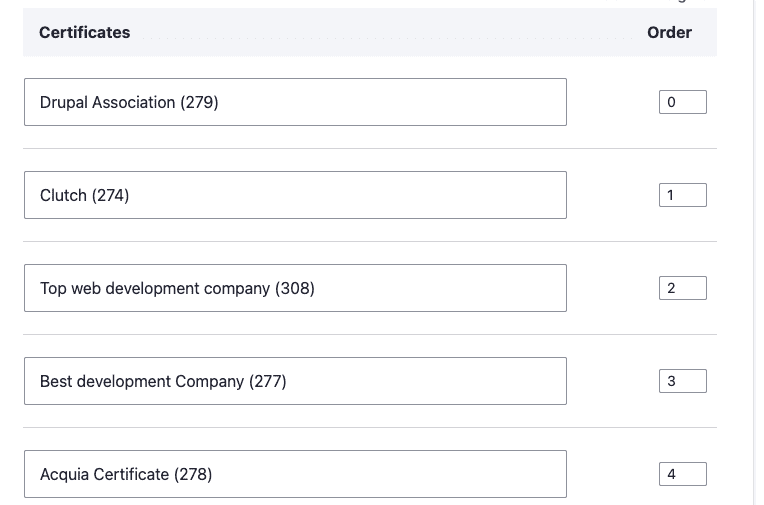
Step 4: Add credentials to build trust
Your customers will trust you if they recognize reliable credentials on your landing page. Make sure you add them in the first viewport to gain your customers’ trust. You can customize Certificate components with fields like title, description, and image.
Step 5: Adding the form
Once you add charming and reliable elements to your landing page, the next thing to do is add the form. If you’re adding a form to your page, make sure to follow these tips:
- Always make sure it’s the first thing your customers get attracted to. Then, they should be able to access the form without scrolling the page.
- Add CTAs on your page so that click on the CTA leads your user back to the form.
- The form or the CTA buttons color should than the rest of the first viewport to bring your users’ attention to it.
- Restrict the form elements to 5 fields or less as most users don’t enjoy filling long forms.
You can use the Webform module to generate a form. This module allows you to create simple to complex forms easily.
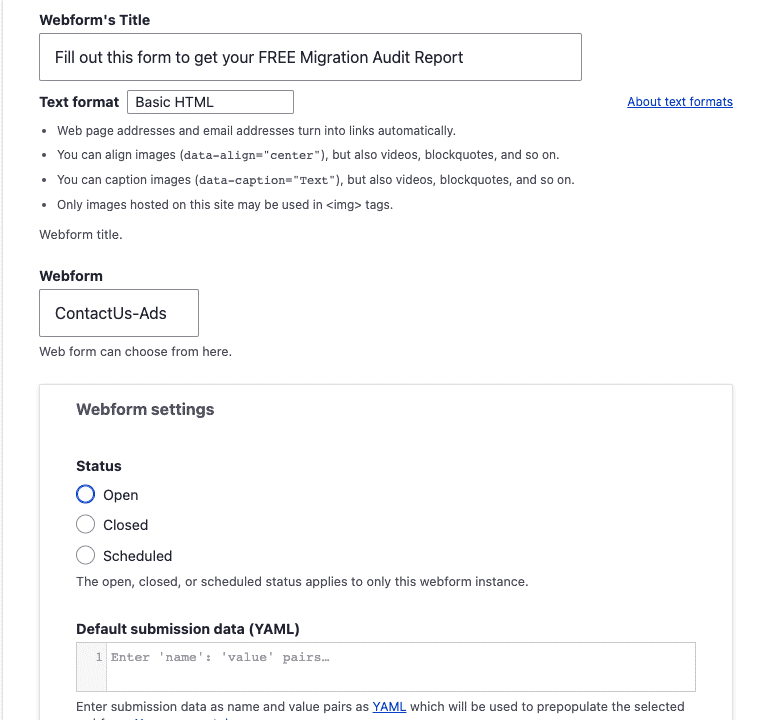
- Webform Title – Keep the title of the form simple and clear like Fill out this form to get your FREE Migration Audit Report
Also Read: Drupal 9 Plugins You Must Have For Your Website
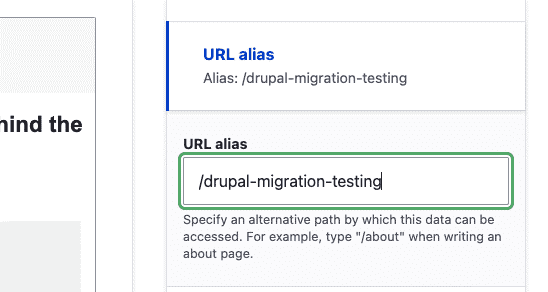
Step 6: URL alias
Once you’re done with designing a top-notch landing page, create a user-friendly and impressionable URL for your ad landing page. Drupal 9 offers the URL alias module in the core that allows you to add and edit aliases whenever required. First, check the right side of the page; you’ll see the URL alias field. Click that button and specify the URL you want to use for your ad landing page.
Step 7: Save it!
Once you’ve entered the URL alias, click the save button to publish your landing page. However, if you don’t want to make it live, uncheck the Publish checkbox and hit save. You can also preview what your page will look like before you save it.
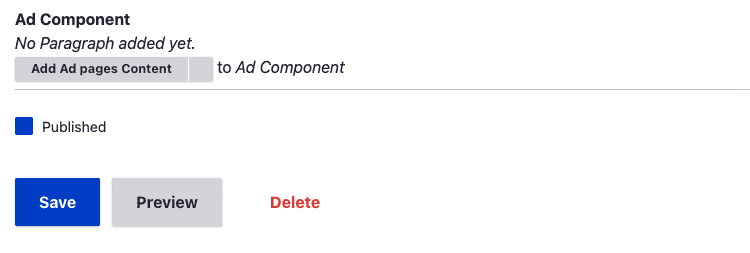
Once you hit the save button, your landing page is live!
Also Read: Why Drupal Is The Key To Success For Enterprise Web Development?
Conclusion
We hope that now you know how to create an ad landing page for your campaign. However, if you still have any doubts, do reach out to us. And, if you need someone to create marketing landing pages on the Drupal 9 website, contact Alberta Tech Works developers today!